Help with planning and frequently asked questions for ruter.dk

If you need help planning a bike trip, you can find the most frequently asked questions below. Additionally, you will find answers to the most common questions about the website.

We hope this provides helpful information and wish you a great bike trip.

About the routes

EuroVelo is a European network of cycle routes. The foundation stone was laid in 1997, and today the network includes 19 routes of more than 90,000 km. Four routes go through Denmark:

  • EV3 – The Pilgrimage Route: Follows the Hærvej route (N3)
  • EV7 – The Sun Route: Follows Gedser-Helsingør (N9)
  • EV10 – The Baltic Sea Cycle Route: Follows the southern part of the Baltic Sea Route (N8) and, mainly, Gedser-Helsingør (N9) to Copenhagen
  • EV12 – The North Sea Cycle Route: Follows the West Coast Route (N1) og and the East Coast Route (N5) between Skagen and Grenå.

The network is centrally coordinated by the EuroVelo team at the European Cyclists’ Federation, ECF, in Brussels. In Denmark, Dansk Cykelturisme is the national EuroVelo coordination centre.

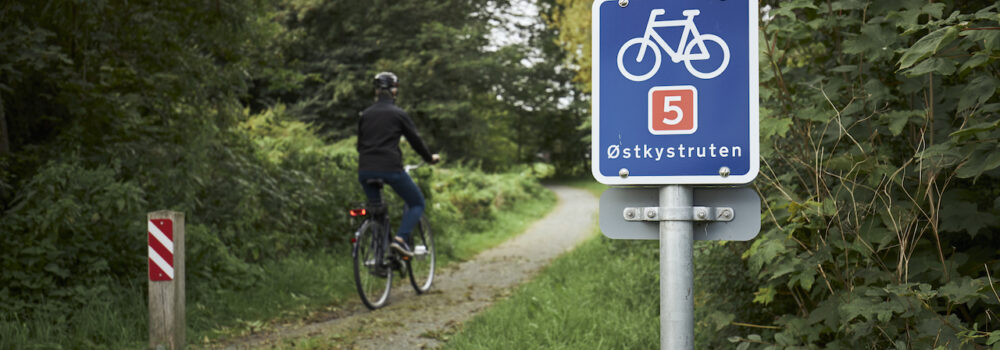
Mand cykler ad en skovsti på National Cykelrute 5 - Østkystruten

The national cycle routes are 11 longer routes crisscrossing Denmark, which was one of the first countries with a national network of cycle routes. The first one was the Ancient Road through Jutland, established in the late 1980s. In the 1990s, development was accelerated, and in 2012 the Limfjord Route was added as the last one. The shortest route around Bornholm is 105 km long, the longest is the 820 km Baltic Sea Route. The total length of the 11 routes is well over 4,000 km.

N1 – West Coast Route: Rudbøl-Skagen
N2 – Hanstholm-Copenhagen
N3 – The Pilgrims Route: Padborg-Frederikshavn
N4 – Copenhagen-Søndervig
N5 – The East Coast Route: Sønderborg-Hulsig
N6 – Esbjerg-Copenhagen
N7 – Sjællands Odde-Rødbyhavn
N8 – Baltic Route
N9 – Gedser-Helsingør
N10 – Around Bornholm
N12 – Limfjord Route

On the way

Even if your bike was in tip-top shape before you set off, you can of course be unlucky en route. But with a little skill and experience you will typically be able to continue after an emergency repair on the road. At least until the next bike repair shop. With good, puncture-free tires, the risk of a flat tire is negligible. Some bike riders report several thousand kilometers without a single puncture. But some are not so lucky. It is a good idea to practice patching and/or changing hoses if you are planning a bike ride lasting several days. If it’s just a day trip and you’re not too far from home or a bus or train station, you’ll probably manage anyway. Bring plastic strips and some gaffer tape for emergency repairs on the bike or equipment, e.g. bags.

In most cities you will be able to find public toilets and in most churches in the countryside as well. The toilet building may be locked, but you can still fill your water bottle in the cemetery. For public toilets in natural resorts: Check the points of interests on the maps here at ruter.dk.

Signs: All the national cycle routes are marked with signs, so basically you can just follow them. But you’ll probably find some additional tools useful. Directions are not only about finding your way en route, but also finding a nice place for a break, shopping and accommodation along the way – and not least planning the rest of today’s or tomorrow’s stage.

Digital tools: There are countless digital tools you can use to find your way and the points of interest you want to visit. All routes here at ruter.dk can be downloaded as GPX files for apps and GPSs.

Apps: At Dansk Cykelturisme, we prefer Osmand and Naviki for route navigation. Both draw data from the user-generated map OpenStreetMap with very large coverage in Denmark, and both are free in the basic version. Naviki is the easiest one to use, but Osmand has far more configuration options.

GPS: You can use a dedicated cycling GPS or an overall outdoor GPS.

Print: Many of us still swear by a printed cycle map. It never runs out of power and provides a good overview of the area you are passing through or planning to visit. If it is water-resistant, it can even be used as a sou’wester.

Planning and preparation

Your bike is welcome on all Danish ferries. The smaller ferries on the less frequented routes are especially great for a short break on the cycle trip. On some ferries, the bicycle is included in the passenger price. On others it costs extra. Be aware that the ticket for the Molslinjen between Sjællands Odde and Aarhus/Grenå are quite expensive unless you get hold of a low-cost ticket (it must be booked no later than the day before).

The short answer is yes. On all Danish train routes, you can bring an ordinary bicycle (unfortunately not cargo and tandem bikes). Bike trailers must be folded together and brought as hand luggage.

At DSB, a ticket for your bike costs DKK 20, regardless of how far you travel. It can be purchased via dsb.dk or the DSB app immediately before departure. Please note that the space for bikes on Intercity and IntercityLyn trains are limited. Those are the train types that cross the Great Belt, and as a train ride is the only possibility here, you may want to book you ticket in good time.

In the local S-trains in the capital area, bicycles are free of charge, and you can bring cargo bikes and tandems as well. More and more bus companies also allow bicycles to be taken along. But the available space is limited, and it is only on some regional busses you can book a place in advance. Check the options at the relevant company if you plan to bring your bike on the bus.

Yes. In 275 of the state’s forests, you are allowed to pitch your tent without asking. It’s called ‘Free Tenting’ and there’s a 1-2-3 rule: maximum 1 night with 2 tents for 3 persons.

You must camp under trees and not to the annoyance of others: Your tent must be invisible for people walking on paths or driving through the forest in a car, and it must not be visible from buildings either. This means that you may not pitch the tent on beaches or in dunes, even if the place appears on the overview map for free camping. The same applies to meadows, marshes, heaths, fields and other clearings without trees.

You have a lot of options for spending the night on a bike tour in Denmark. On the maps here at ruter.dk you find hotels, inns, hostels, bed & breakfast, camping, holiday resorts, shelters and free camping areas.

In the summer months, it may be a good idea to book accommodation in advance, unless you are cycling with a tent. Most campsites will always find room for one more tent. Please note that many shelters can be booked via udinaturen.dk.

At many accommodations you can park the bike safely for the night. Ask, if you’re in doubt of where to park. Experience shows that a good solution almost always can be found.

If you ride an electric bike and need to charge the battery overnight, you better ask permission first. There is a small risk of fire when charging batteries, and the accommodation may have a special place for it. If you spend the night in a shelter, you must plan a longer coffee stop to recharge your battery.

Many Danes offer free or very cheap private accommodation. Check brugminbaghave.dk and warmshowers.org.

Definitely! But it is difficult to tell in general how far they can bike. Children are very different and cycling skills do not necessarily follow age. It is more about how accustomed to cycling they are. A child of 6-8 years who cycles daily will easily be able to cycle up to 25 km in a day. So, if the kid wants to bike …

When you are taking children, plan the cycling trip a little more thoroughly than if you are going on your own. Plan plenty of time for breaks and map out the playgrounds before you leave. It is also a good idea to have a plan B ready if the weather changes or the desire suddenly ceases. A motivational factor can be a small prize every time you have cycled 5 km. You can find playgrounds and other good rest places via icons on the maps

You start right here! On ruter.dk you find a description of each route, and you can plan your cycling trip using the maps that also show relevant points of interest such as accommodation, catering etc.

A good rule of thumb is to assume that you cycle about 12 km/h on average incl breaks. If you set off right after breakfast, you will often be able to cover 30-40 km before lunch and twice that before dinner. Of course, it all depends on how many stops you make along the way. And maybe the whole purpose of your trip is to visit a certain museum on your way and spend a good amount of time there.

We recommend planning with a little air in the program. It is a pity to pass by a nice view, a good beach or an exciting museum and not have the time to enjoy it. And it’s not funny if you must bike far in very bad weather or if the bike or your legs won’t cooperate.

If you are going on your first overnight trip and haven’t been a scout for ages, you can make it a little easier for yourself by choosing to sleep indoors in a hotel, hostel or similar. You can carry much less luggage, and you won’t have to set up a camp when you arrive at your destination. Instead, you can flop down in a chair.

Another tip is to plan with the public transport. If you are going on a day trip, maybe you can take a train or a bus some of the way. This option can also take you outside the immediate area. And on a longer multi-day trip, public transport can be an ideal way to get back to the starting point.

If it’s the first time you’re going on a long trip and you’ve never biked more than 20 km in a stretch, don’t worry! In a relatively flat country like Denmark, it doesn’t take much before you cycle off at 10-15 km/h. And then you have covered 20-30 km in a few hours, maybe even with a short break along the way.

But still, it may be a good idea to let your hands, bottom and feet get used to the handlebars, saddle and pedals. Depending on how long a trip you plan, start using the bike regularly a month or two in advance. Perhaps you are lucky enough to be able to cycle to work, shopping or leisure activities. If not, take an evening and/or Sunday tour. And remember to give the bike a service check at your local shop before the trip. Now that you’re ready, it’s a shame if the bike isn’t too!

Preparing the bicycle

It’s quite simple: Almost no matter how long a trip you plan, bring tools, food and extra clothes.

Tools

Only bring tools you can figure out how to use yourself.

For the short trip – the basic package:
Pump
Puncture kit

For the long day trip – the midi package:
Mini tools for bicycles
Extra hose
Plastic strips and a meter of DUCT tape for emergency repairs

For a cycling trip – the maxi package:
Cable cutter
Nipple wrench
Chain tool
Gear and brake cable
Chain link
Oil or wax for the chain
Disposable or work gloves

Remember: The easiest way to avoid needing tools is to give the bike an inspection before the trip.

Cykeltasker pakkes før afrejse

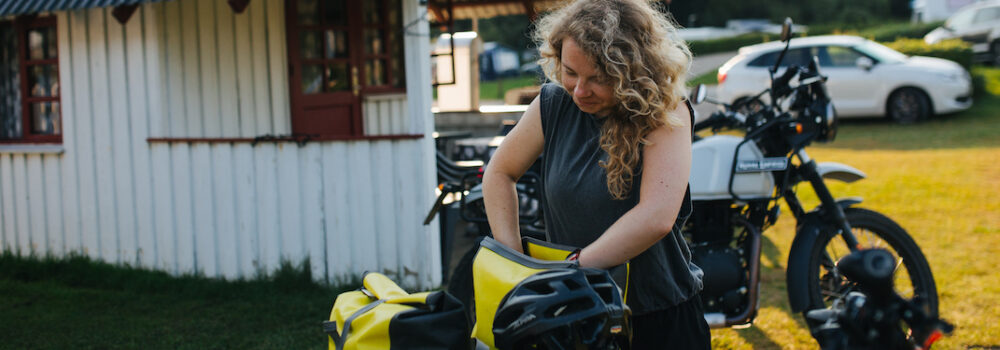
Waterproof bags that fit securely on the bike are definitely an advantage. But if you’re planning a trip just to try it out, don’t invest in expensive bags. Maybe someone can lend you a set of bags for the luggage carrier? If not, fasten the bag securely to the luggage carrier. A backpack is not the optimal, as it hinders your freedom of movement and presses you down in the saddle.

Just like bikes, bicycle bags are available in all possible versions. The classic side bags are strapped to the side of either a rear or front luggage carrier. The rear bags usually hold 20-25 liters each, while the front ones are slightly smaller. In addition, there are handlebars bags which typically hold 2-12 liters. They are good for storing the things you want easy access to. Saddlebags that are fastened to the seat post can be an alternative to side bags on bicycles without luggage carriers.

You’ll also find a new type of bags on the market. They are fastened directly to the frame or front fork.

An overall piece of advice is to pack your bike as lightly as possible. The lighter a bike, the nicer a ride. If you must bring a lot, e.g. because you want to sleep out, pack the heaviest things as low as possible. And make sure to make the weight even on both sides.

On most regular bikes it’s best to pack the heaviest items at the luggage carrier at the back. More specialized touring bikes can handle quite a bit of weight on the front fork without the handling being negatively affected – and some bikes even become more stable with weight in front.

Make sure that bags and luggage are securely fastened. Check frequently if anything is shaken loose, especially if you are cycling with untested equipment.

Make sure belts and such are well away from wheels and other rotating parts

In the vast majority of cases, you’ll be able to use your normal everyday bike for a cycling holiday, even if you plan to ride for several days and carry luggage. So you don’t need to invest a lot of money in a new touring bike if you’re travelling for the first time. Instead, spend a little money on getting your everyday bike ready for touring. If it doesn’t have mudguards or a luggage rack, it might be a good idea to have them fitted. If the tyres, chain and cables are well worn, get them replaced before your ride. It’s such a shame if a technical breakdown ruins your first ride.

Once you get a taste for touring by bike, the options are endless! In short, there’s a bike for almost every purpose. From classic touring bikes, which typically have fixed mudguards, lights, lots of gears and a comfortable riding position, to modern bikepacking bikes with wide tyres and luggage strapped directly to the frame. This makes them particularly suitable for more challenging terrain, such as tracks and gravel paths. Finally, there are of course e-bikes, which are generally excellent for touring. If you’re looking to invest in a new touring bike, we recommend you start your search at your local bike shop.